

How To Make A Fake Surveillance Camera
A few weeks agone we released a project called balenaCam where @mbalamat developed an application running on balenaOS that initiates a WebRTC video streaming connection between the server (a Raspberry Pi, for instance) and the client. You lot can check the full blog mail here.

Once the primary core of the awarding was stable, we decided to challenge ourselves and take the project down a slightly different route; turning a fake CCTV Camera into a real working CCTV Camera, where we command the software running on it 🤯.
Come up with united states of america in this step-past-stride tutorial showing how you can build the hardware and software of this Fake/Real CCTV Camera!
Let's go!
Hardware required
Hither'southward a list of what you need for this project:
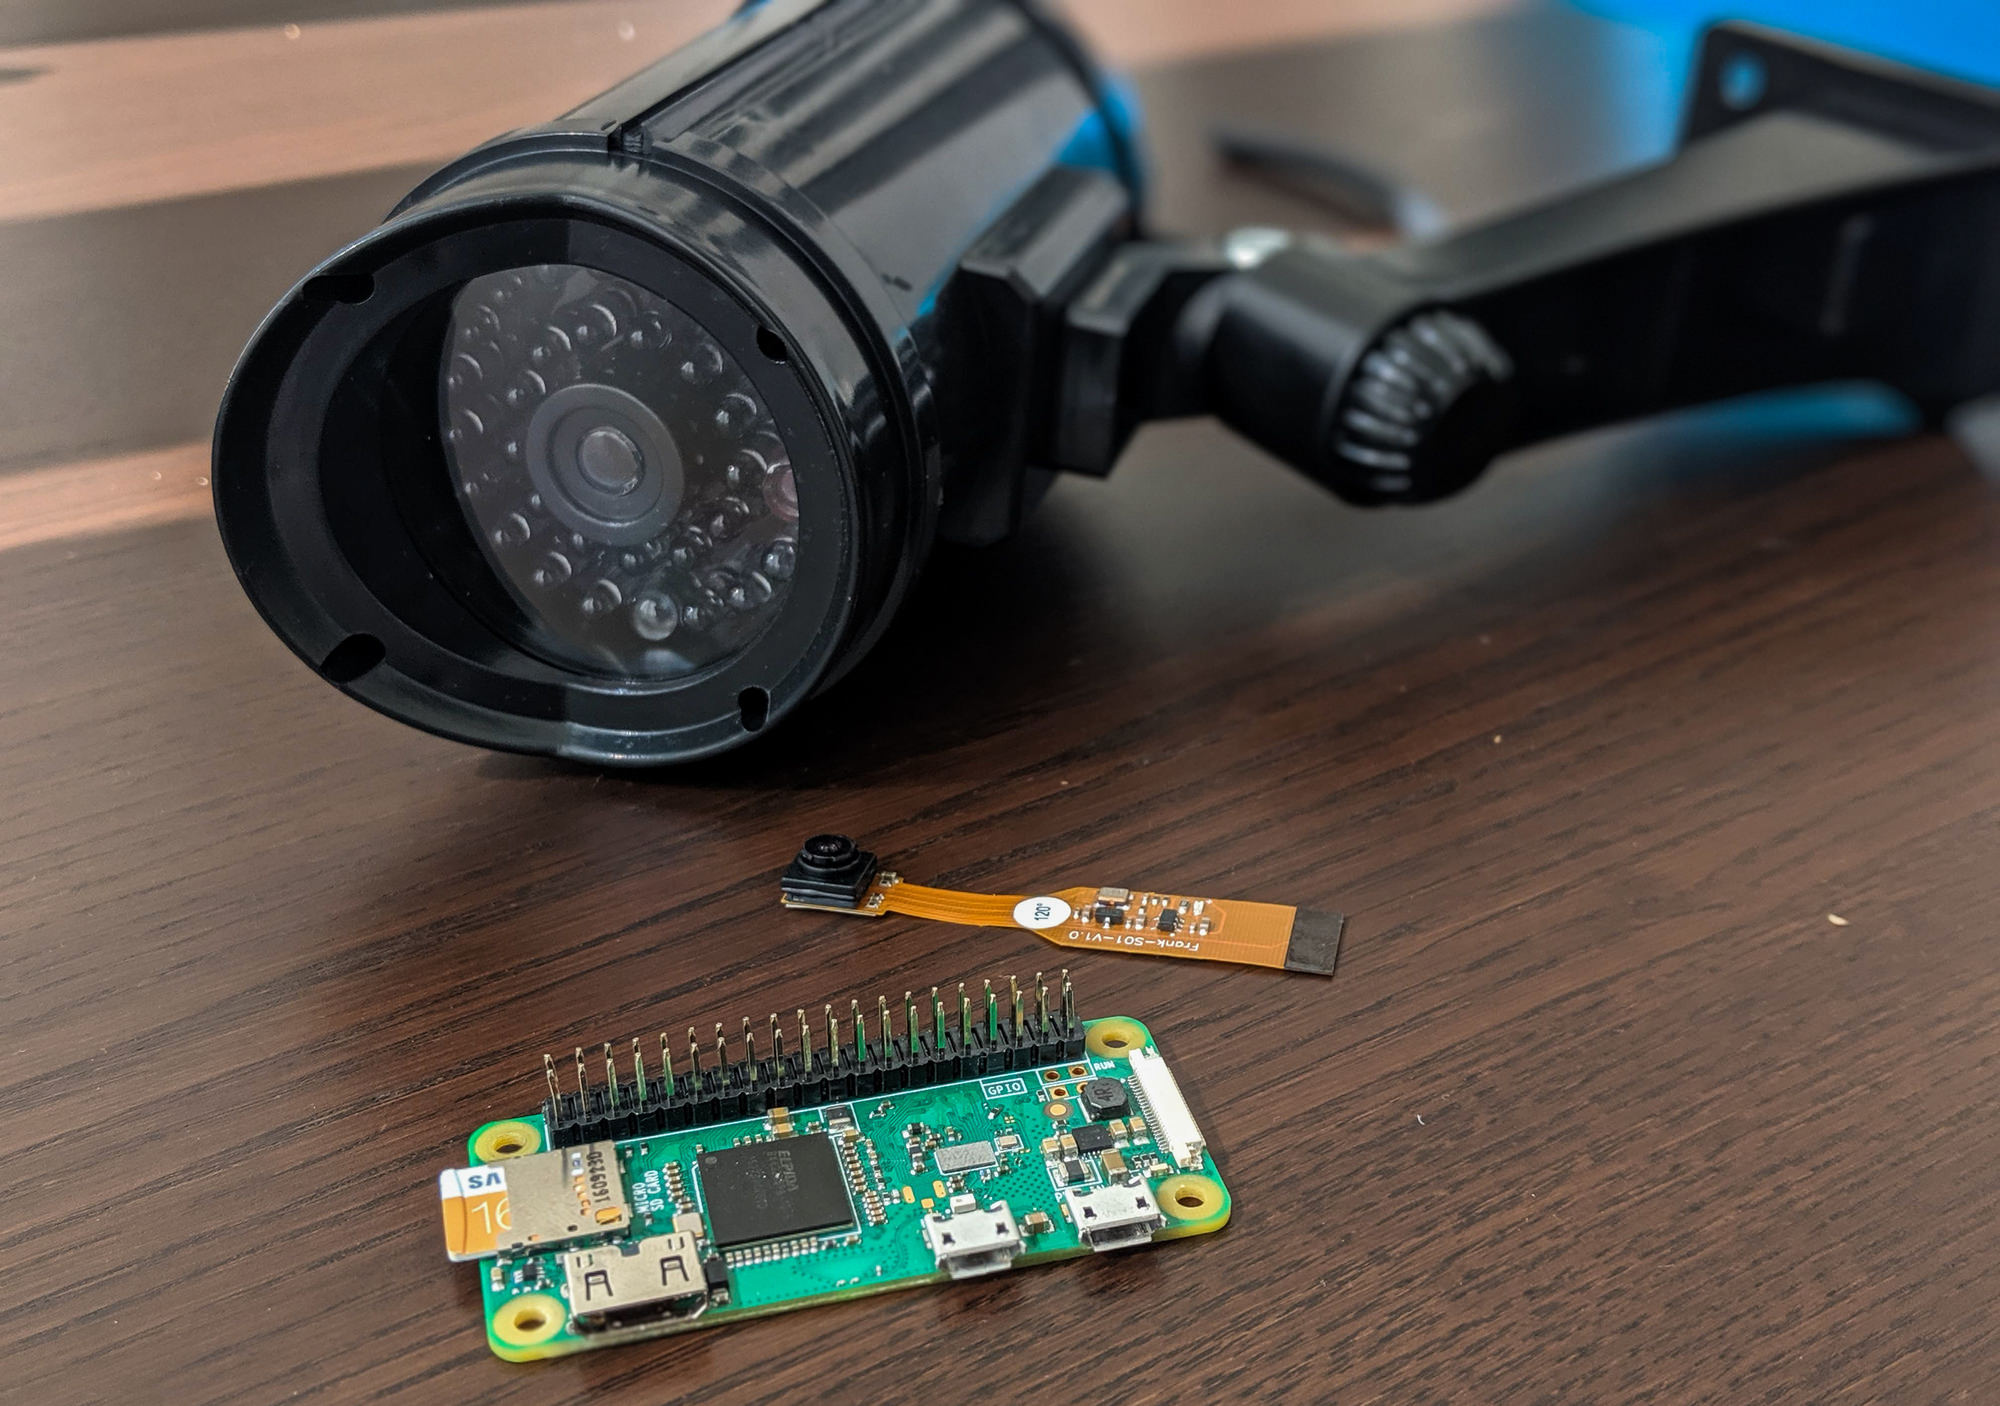
- Raspberry Pi Cypher Westward: ~$ten - This is the main brain of the functioning, the device will procedure the images from the camera, and transmit them via WiFi to be accessible over the internet via WebRTC.
- Wide Angle – Camera Module for Raspberry Pi Aught: ~ $17 - We chose to use this wide-bending lens for the Raspberry Pi Zero for its minimal form factor then that it fits on the cylinder of the fake camera. Information technology has a 5MP sensor (2592x1944 pixels) and can display 53.fifty degrees horizontal, 41.41 degrees vertical field of view. Perfect for our project!
- Faux Surveillance Security Camera: ~ $9 - We looked for a cheap faux camera that looks real enough (this 1 even includes a flashing scarlet LED).
- microSD card: 16GB recommended.
- USB Power Supply and micro-USB cable: 5V and 1A recommended.
- You will also need a soldering iron, glue gun, and one 330Ω resistor.
Software required
Just as y'all demand hardware for this project, yous also demand software! Here's what y'all need:
- A balenaCloud business relationship: You tin sign upwards for complimentary here. You volition apply this account to manage your Raspberry Pi device.
- balenaEtcher: balenaEtcher is a desktop application that you volition utilise to flash balenaOS onto your microSD or standard SD memory carte du jour. You can download balenaEtcher here.
- Balena CLI: You will utilize the balena cli to push the awarding code to the device. Cheque the installation guide for different operational systems here.
1. Assembling the hardware
In this department, we will go through the process of taking the barebone fake camera, mount our Raspberry Pi Nada Due west with the wide-angle lens camera and transform it into a existent surveillance camera. Let's go! 💪
First upward, have the photographic camera apart, you volition notice that the hardware itself is extremely unproblematic. There is one battery back up for two AA ane.5V batteries, which powers a red LED (this is a special led, that blinks when supplied power).
Taking the camera apart


Adding the camera to the setup

One time y'all have all the parts of the camera separated, we are ready to add our own hardware. What nosotros take to practise now is to observe a way to insert our ain lens within the open hole of the cylinder.
The easiest way to brand certain the camera module is placed in the center of the cylinder is by designing a pocket-sized plastic container to identify the photographic camera, as displayed in the image beneath. (If yous take a 3D printer available, you can download the part from thingiverse.
- In example you don't accept access to a 3D printer, you can make utilize of a hot mucilage gun or fifty-fifty white arts and crafts mucilage to identify and secure the camera inside the cylinder.


Adapting the resistor for the Raspberry Pi
Once the camera is placed in the right position, we can focus on the blood-red LED for a second. We tin simply disconnect (unsolder or cut the wires) from the bombardment socket.

We want to power the LED from our Raspberry Pi, and for that, nosotros volition solder a 330Ω resistor on the tip of one of the LED pins and solder two female jumper-cable in lodge to make it easy to connect to our device.


Now we tin connect the LED between any of the 3.3V or 5V (01, 02, 04, 17) pins to the GND (06, 09, 14, 20, 25, 30, 34, 39). And we are done! This LED has a specific characteristic where when power is applied it automatically starts to glimmer. 😉
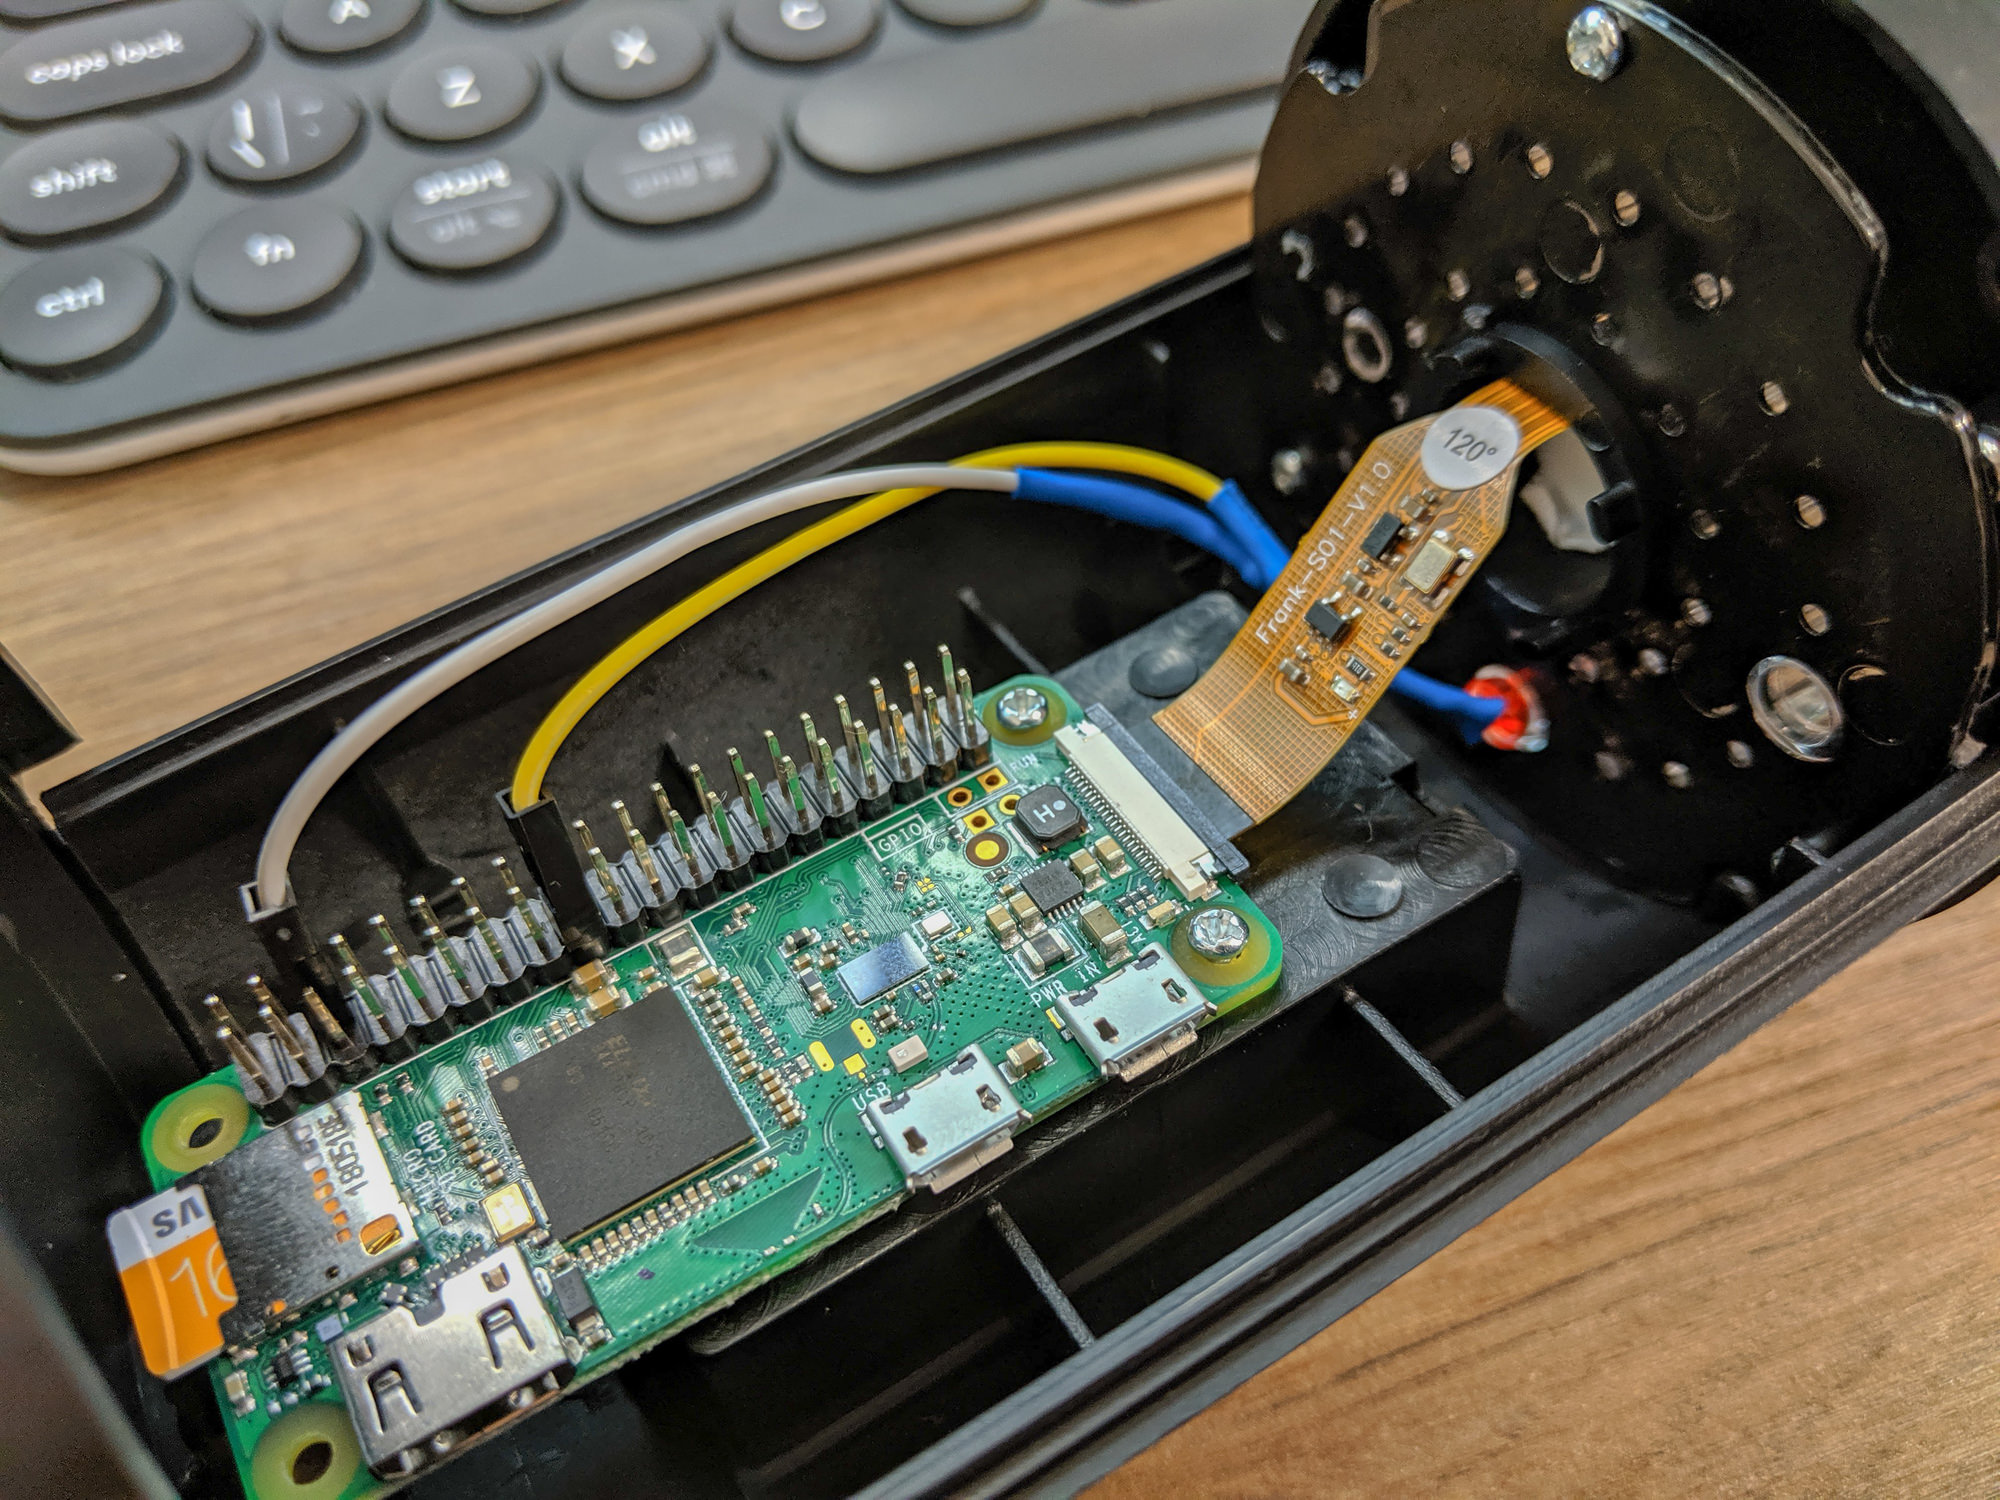
Connecting the hardware

Information technology is time to assemble everything back together, start (as shown in the above image).


Make sure you gently attach the flex cable to the connector on the Pi as shown in the prototype below. To brand the whole setup more stable, you tin can likewise screw or hot-glue the device to the plastic casing.
You lot need to replace the faux cable on the camera with a existent micro-USB cablevision that you will and so use to power the Raspberry Pi.

Before assembling everything dorsum together, cheque out the next steps on how to setup the software and make certain everything works.
ii. Setting up the Raspberry Pi
Beneath nosotros'll walk yous through each of the steps required for setting upwardly the software on your device to deploy the photographic camera awarding.
Sign up for a free balenaCloud business relationship
The first affair yous'll need is to sign up for an business relationship. If you lot've already got a GitHub or a Google account yous can utilise that to log as well.
Install and link the balena CLI to your account
The next pace is to download and install the balena-cli on your figurer. The documentation for the CLI tools is the best place to offset and covers the installation and setup of both the npm package and the standalone binaries.
When y'all have the CLI installed and working, the first pace is to log in to balenaCloud by issuing the balena login command:


Once you've reached this point, and accept a working CLI which has been logged in to your account, you lot're ready to start pushing code to your device.
Create a balenaCloud application
In one case logged in your balenaCloud business relationship, click on the green "Create application" push button near the top left-manus side of the interface. Next, give your awarding a proper name, select the device model of your Raspberry Pi, in our case a Raspberry Pi (v1 or Naught). Yous can select the "Starter" account package, as this account type is complimentary and volition accept everything you need. One time you create the application, the master dashboard for the application will load.
Add a device and download the balenaOS disk paradigm
Subsequently creating the application, the next step is to add a new device. Click the green "+ Add together device" push on the top left department of the awarding interface and follow the instructions. When adding the new device:
- Use the recommended build version of balenaOS.
- Select the "Development" edition of the recommended balenaOS version. The evolution edition has a diverseness of testing and troubleshooting tools that are often useful. Read more well-nigh the differences betwixt the development and production editions here.
- If you programme to connect your device to a WiFi connexion, enter your WiFi credentials (annotation that the Raspberry Pi Zero W is not capable of connecting to 5GHz WiFi networks unless you apply an external WiFi adapter that supports it).
One time you select the configuration options, click the blueish "Download balenaOS (~137 MB)" button. This will download the custom balenaOS disk image to your desktop.
Flash your SD card with the balenaOS disk image
Afterwards you lot take successfully downloaded the balenaOS deejay image, you now need to wink this disk image to your SD card. We recommend using our own balenaEtcher for this purpose.
To flash your SD carte du jour, connect information technology to your computer via an internal or external SD reader/writer bulldoze. Open balenaEtcher, select the recently downloaded balenaOS deejay image and select your connected SD menu every bit the destination drive. Next, click "Flash" to write the deejay epitome onto your SD card. This writing process can have several minutes.
After you successfully flash balenaOS onto your SD bill of fare, safely eject the SD card from your computer and insert the SD carte into your Raspberry Pi. Next, connect your Raspberry Pi device to a power outlet. The device should then kick upwardly with the balenaOS operating system. Once the device boots up, y'all will come across the device listed as "Online" on the balenaCloud dashboard.
If you lot don't run into the device online, check out Balena's all-encompassing troubleshooting guide. Likewise, check out Balena's forums, as they have a wealth of useful information on any contempo issues.
Deploy the balenaCam awarding to your Raspberry Pi
Now that y'all have the balena-cli working on your computer and your device is online and showing on the dashboard, it's time to deploy the lawmaking. ✨✨✨

We are going to set a balenaCam application released a few weeks ago. The entire code is hosted on GitHub here . Visit the project repository page and Clone or Download Zippo to your computer.

With the file downloaded and unzipped to your computer, using the last, go to the newly created folder and button the code alive with the command balena push button <application-name>, with <application-name> being the name you created on the dashboard.

Configuring your device
At this point, your device will get-go downloading and installing the containers. Meanwhile, get to Device Configuration on the dashboard and add the following Custom Variables:
Set all of these, so your Pi can autoselect the gpu_mem allotment automatically depending on the amount of RAM available and the showtime configuration.
| Proper noun | Value |
|---|---|
| BALENA_HOST_CONFIG_start_x | one |
| BALENA_HOST_CONFIG_gpu_mem_256 | 192 |
| BALENA_HOST_CONFIG_gpu_mem_512 | 256 |
| BALENA_HOST_CONFIG_gpu_mem_1024 | 448 |


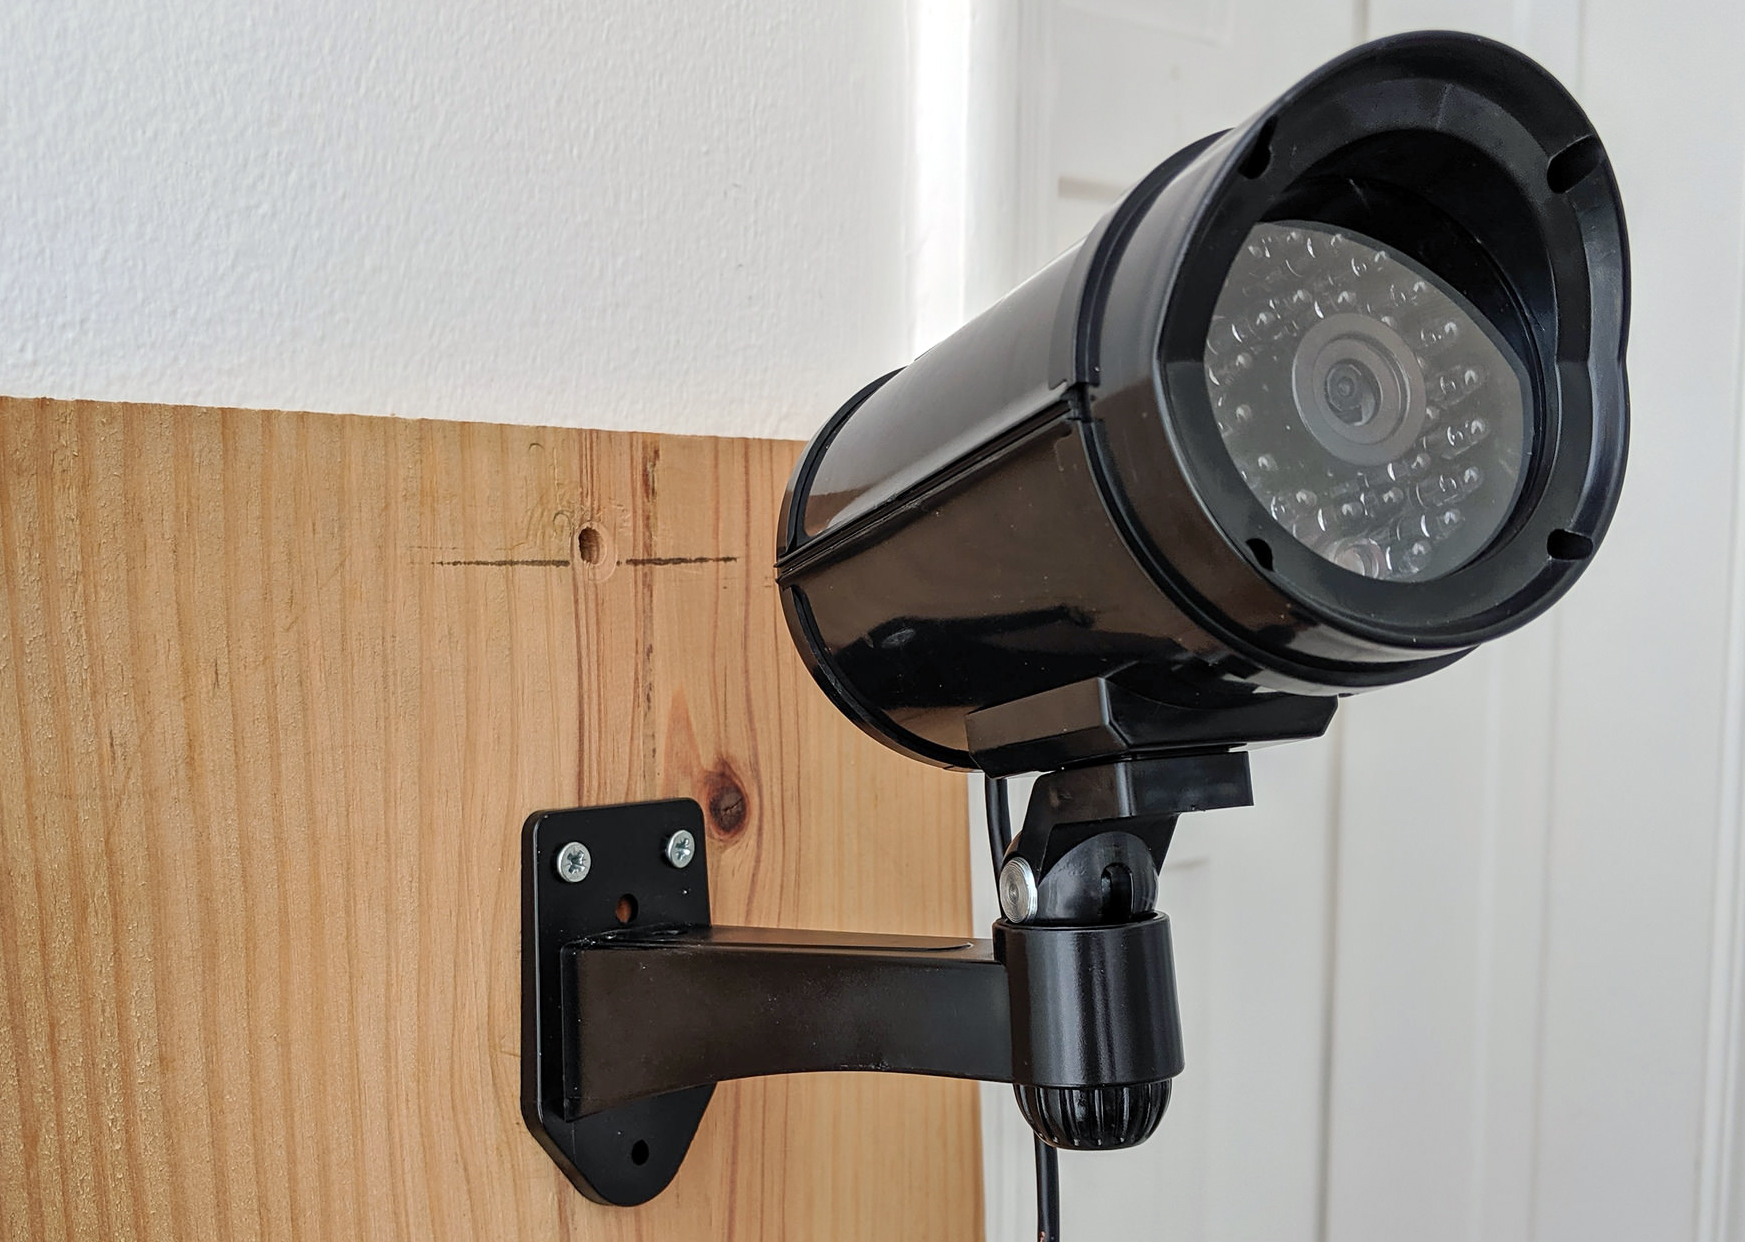
With the custom variables fix, get to the device main page and toggle the PUBLIC DEVICE URL and click on the arrow icon. It volition open a new browser tab and you will now be streaming the images from your "FAKE" surveillance photographic camera.


And Voila!
Congratulations, you have only finished turning a simulated surveillance photographic camera into a real and working one with a Raspberry Pi and balenaCloud! The side by side steps for this projection would be to amend the software running on balena to record video (remember that currently, nosotros are merely streaming the video feed), notice movements and more than. Let the states know what you have in mind, possibly we can build it together!
Thanks for reading!
If you decided to build your own real surveillance camera, we'd dearest to hear how it went, similarly if you lot got stuck or have whatever questions, let us know in our forums at https://forums.balena.io, on Twitter @balena_io, on Instagram @balena_io or on Facebook.
Source: https://www.balena.io/blog/bring-a-dummy-security-camera-to-life-using-a-raspberry-pi-and-webrtc/
Posted by: perrysirainclont.blogspot.com
0 Response to "How To Make A Fake Surveillance Camera"
Post a Comment